5. It helps with vacuuming. On the one hand, you’re creating more area to vacuum when you raise furniture off the floor. But on the other hand, I feel like you can really get around a piece of furniture and vacuum better when it’s off the floor.
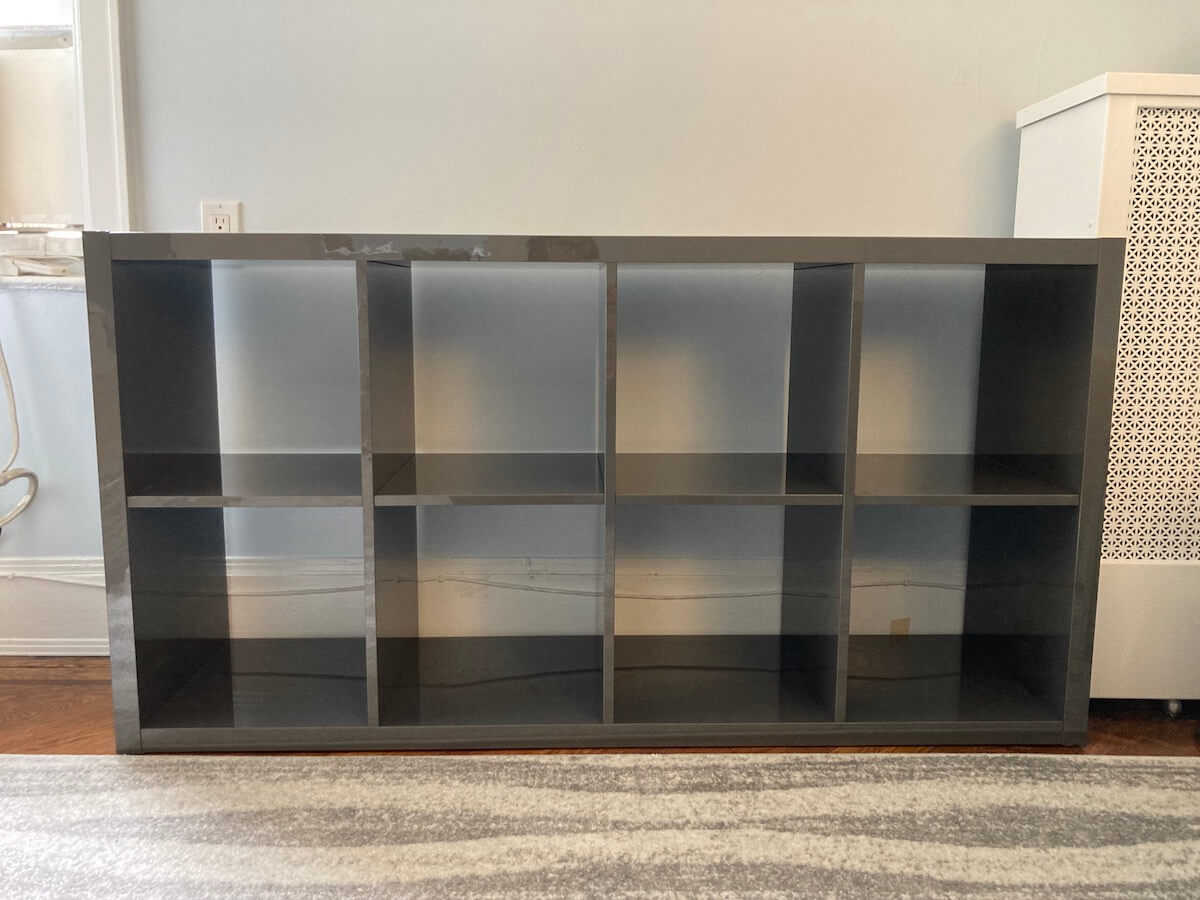
In my case, I wanted to turn a Kallax shelf into a dresser. The bedroom in my Brooklyn apartment is only 10 by 10 feet. A queen bed takes up most of the space. While I could probably squeeze a dresser in, opening it would be awkward. There’s just not enough space to both open the dresser and stand in front of it.

Most dressers are 18″ deep. Kallax is 15 3/8″ deep and those couple of inches make a difference. I also figured that cube storage is easier to access in a tight space than pulling out a whole drawer. (Another option is the Eket cabinet, which is even smaller at 13 3/4″ deep. Ikea even sells its own legs for the Eket.)
Genius Ikea Kallax Hacks For Lots Of Storage
To store clothes, I added Dröna foldable storage cubes. (I’ll write another post about how to organize clothes in storage cubes. It’s a bit of a challenge since at 13″ tall they’re deep.)
Drona storage box in dark blue – $6.99 (These used to be $5, but Ikea recently raised prices on a lot of items, probably due to supply chain issues.)
After I loaded up my things in the Kallax, though, I didn’t feel satisfied. Visually, it just seemed kind of heavy, especially in such a small room. So I decided to add legs. Raising it by 6 inches also made it a better height in relation to the bed.
The Super Easy Way To Add Legs To An Ikea Kallax Shelf
There are lots of places that sell furniture legs. Honestly, shopping for the legs was the most time-consuming part of this whole process. A few places to look: home improvement stores, Amazon, and Etsy. There are also companies that specialize in this, like Prettypegs. (A word of caution: Etsy bills itself as a marketplace for handmade and artist-made items. While some folks on Etsy are artisans and woodworkers, there are lots of manufacturers that list to the platform and crosspost to Amazon too.)
Adding the legs to the Kallax didn’t take long for me and the Mister. First, we placed the legs where we wanted them. Then I taped them down with painters tape.
Then, we screwed the plate into place. Because Kallax is kind of hollow — the frame is chipboard or fiberboard, but the inside is a honeycomb filling structure made mostly of recycled paper — it’s not hard to use a screwdriver by hand.
Genius Ikea Kallax Shelf Hacks & Diy Ideas
Here’s where our Kallax lives. See, I’m not kidding about it being a small room. My nightstand (the Knarrevik) is right between the bed and Kallax, so I only keep things I don’t need to access often in that bottom left cube.
I wish I had room to take an after photo of my Kallax with legs from the front view. But in between the very first photo in this post and this last one, my bed arrived. So, I can no longer get a clear shot of the Kallax from the front. I even contemplated moving the Kallax out to another room to get a photo for the sake of bloggery, but eh, that’s a lot of work. (If you’re curious about the bed, check out my review of the Thuma bedframe and Saatva mattress I decided on.)
It’s a small change, but I feel like the legs make a difference. It looks a little more luxe. Plus, I like to tuck my slippers under it.

How To Add Feet To An Ikea Kallax
UPDATE 7/1/22 – I just noticed that Ikea is finally offering their own legs for Kallax. They sell this square-legged metal base in white and black for $27. I don’t remember seeing this option when I was furnishing my apartment in the fall of 2021, so it must be new. (The oldest review on their site for this product is from December 2021.) Not bad! Of course, hacks are still the way to go if you want a different look.
Small Space Solutions: How to Organize Clothes with Boxes & Bins Ikea’s Beautiful Nymö Lamp Shade Bed Sheets Review: Target Threshold vs. Ikea Skogsnarv Minimalist Style with Planters From Ikea
Welcome Objects participates in affiliate programs, which means purchases made through links may result in a commission for me. This doesn’t affect content — I only write about things I’m interested in. Thanks for the support!
Adding Legs To Kallax... Help! I Want To Put It Longways. Ideally, I'd Like To Use The Nannarp Legs. More Info In The Comments
Bags black friday bras cashmere comfy shoes coupon codes cyber monday decluttering denim designer collaboration dresses everlane fall wardrobe fitting room fail fitting room review flats home decor home organization ikea jeans made in the USA nordstrom nordstrom anniversary sale pact pandemic diary pants petite-friendly planters quince reusable not disposable sale shirts shoes shopping habits silk shirts sneakers summer wardrobe sweaters t-shirts tank tops target uniqlo vetta work wardrobe year in reviewEvery now and then I make a change or update to our house (or something in it) and don’t think or intend to dedicate an entire blog post to it. Then, over time, I start to rack up questions or comments about a particular change, and it occurs to me that other readers might be curious about the update too! So is the case with the feet on the Kallax shelves in our new playroom. Figuring out just how to add feet to an IKEA Kallax wasn’t the easiest process (I found lots of pictures but no how-tos), so it’s no wonder I’m getting questions! Well, today I’m showing you just how easy and affordable it is to give your shelves (no matter where they’re from!) a quick boost!
As most of you all know, I love love love a good cube storage system for a variety of things but most especially toys. When I saw the layout of our new basement (even before we moved in!), I knew a line of Kallax shelves along the far wall would be a phenomenal solution for organizing and storing all of Henry’s toys and craft supplies. We had just enough room to fit two 4×2 units and one 2×2 unit, and I loved the focal point and ample storage they provided! While they functioned perfectly and looked just fine, I didn’t whole-heartedly love the units sitting right on the floor.

I thought the addition of feet would give the shelves more of a furniture-like appearance and make them appear larger in the space (which would ultimately help that wall of the room look more balanced with that weird ledge). Below is a snapshot of the shelves shortly after moving in, before we installed the feet.
Kallax Base On Legs, Black, 146x39x18 Cm (571/2x153/8x71/8
At first, I had dreams of adding cute, stylish feet to the shelves. But when I started to add up the costs for 12 feet (4 for each unit), they were proving more expensive than the shelves themselves. Not willing to give up on my vision, I searched around online and ended up back at IKEA, specifically in the kitchen section, and discovered the Capita feet were a truly affordable option.
The only bummer, at least to me, is that you need to weigh your preference between color and height. The chrome-colored feet only come in the 6-6.5″ height, whereas the white (which are a bit cheaper) only come in the 4-4.5″ height. I ultimately chose the taller height, but really would have preferred white.
When I first asked Greg to help me install these feet, I think both he and I were mentally prepared for a tedious project. He may have even questioned if it was going to be worth the hassle (to me, of course, it’s always worth the hassle!) However, we were both pleasantly surprised that within 20 minutes, all 12 feet were installed and the shelves were back upright! This project is simple and fast…here’s what you need!
Ikea Kallax Hack Ideas
1- Kallax shelf | 2- IKEA Captia Chrome feet: 6″ height, 4″ height | 2 – White feet: 4″ height 4- |Electric screwdriver | 5 – Level (optional)
There are two really great things about Capita feet. The first is that the mounting plates come with the legs themselves, so there is no extra cost associated with adding the feet (typically, you have to buy the feet and the plates separate). Everything you need, including the screws, is included in the set! The second thing I love is that the mounting plates are flat (versus the contoured ones at the hardware store), so you can mount them to a flat-bottomed unit without having the hardware/plate bulge and show. #IKEAdoesitagain
Start by determining where you want your legs to be. Then, using an electric screwdriver, secure the plate to the shelf with the included screws.
Anyone Successfully Add Legs To A 4x4 Kallax? I Tried And They Collapsed. Any Tips?
The feet kit comes with a large black “washer, ” which is used to make the feet just a touch taller. If you want, twist this piece onto the exposed bolt first, and then twist on the leg. And that’s it! Yup…it’s that easy!
One thing to note (especially if you are going to do this in a space where kids will have access to the shelves) is that the feet make the shelves a tad unsteadier than if they

0 Comments
Posting Komentar